Coffee · Jan 29, 2025

How to Create a Home Coffee Station That Actually Works

Build a practical home coffee station around your real brewing routine, with smarter zones for beans, grinding, water, brewing, storage, and cleanup.

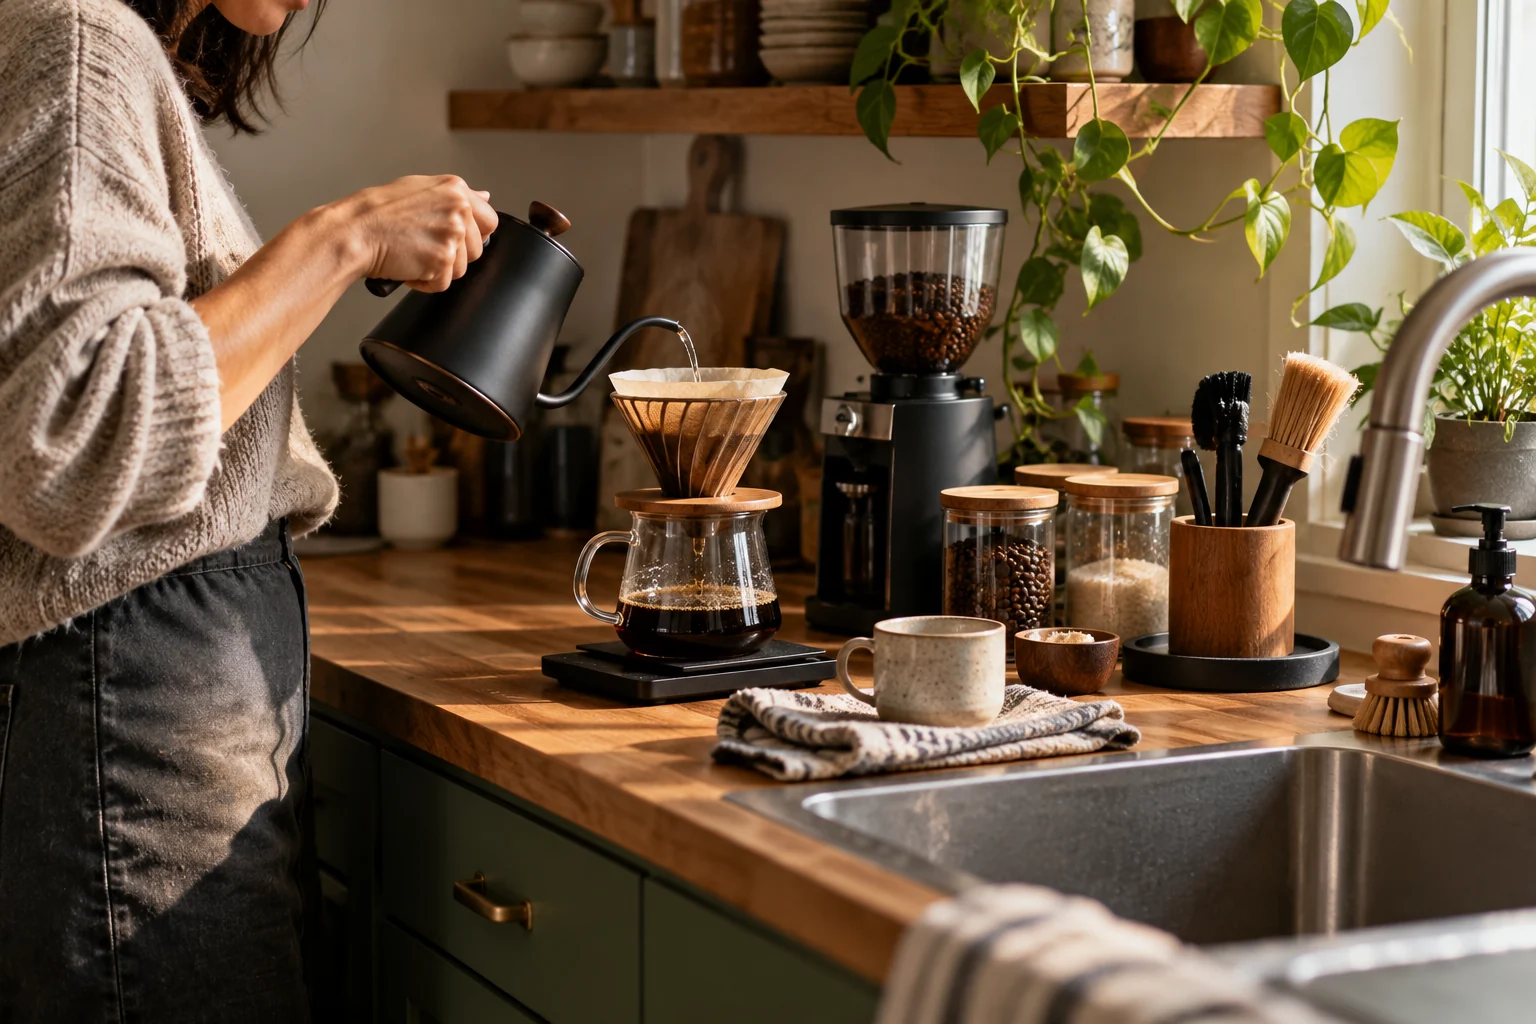
A lived-in home coffee station with grinder, pour-over brewer, storage canisters, cleaning tools and a nearby sink.
AI-generated editorial illustration.

A good home coffee station is not the one with the most gear. It is the one that makes your normal coffee routine faster, cleaner, and more consistent.

The easiest way to build one is to organize the space in the same order you make coffee: store the beans, measure and grind, prepare water, brew, serve, then clean. Once those steps flow naturally, the setup feels intentional even if it occupies only a small section of a kitchen counter.

Start with the equipment you already use. Add new tools only when they solve a real problem.

Start with your actual coffee routine

Before buying shelves, canisters, kettles, or a new machine, write down what you make most often.

Your station will look very different if you usually make:

  • automatic drip coffee for two people
  • a single pour-over each morning
  • espresso and milk drinks
  • French press on weekends
  • cold brew in batches
  • several different brew methods depending on the day

This matters because the best coffee station is really a workflow, not a collection.

If you make pour-over every day, the grinder, scale, brewer, filters, kettle, and mug should be within one or two easy reaches. If you use an automatic brewer, your priorities may be water access, filter storage, coffee dosing, and a clear path for removing the carafe.

Do not design a showroom around equipment you rarely use.

Choose the right location

Look for a place with enough room to operate the equipment safely, not just enough room to display it.

A useful coffee-station location usually has:

  • a stable, level work surface
  • convenient electrical access for powered equipment
  • enough overhead clearance to open lids and fill water tanks
  • room to remove grinder hoppers, drip trays, or brew baskets
  • nearby water access or an easy path from the sink
  • enough light to weigh, dose, and clean accurately
  • a place for used filters, grounds, and towels

If you are using espresso equipment, follow the manufacturer's clearance, electrical, water, and ventilation instructions. A beautiful arrangement is not worth blocking a machine's vents or forcing a cord into an unsafe position.

Also think about what sits above the station. A brewer that releases steam directly under a low cabinet may be annoying even if it technically fits.

Build the station in zones

You do not need labels on the counter. The idea is simply to keep items together by task.

Zone 1: coffee storage

Keep the coffee you are actively using close to the grinder, but protect it from unnecessary exposure to air, moisture, heat, light, and strong odors.

The National Coffee Association has long emphasized freshness, storage away from heat and moisture, and grinding immediately before brewing when possible. That makes a cabinet, drawer, or opaque container near the brewing area more useful than a decorative clear jar sitting in direct sunlight.

For most households, there is no reason to decant every bag purely for appearance. If a quality coffee bag closes well and keeps the beans protected, it can remain part of the station.

Zone 2: weighing and grinding

For whole-bean coffee, the grinder is one of the most important tools in the setup.

Put it where you can:

  • reach the hopper or dosing cup comfortably
  • place a scale nearby if you weigh beans
  • brush or wipe loose grounds without moving three other appliances
  • adjust the grind without reaching behind another machine

A burr grinder is useful because it gives you a controlled range of particle sizes for different brewing methods. Your existing Brew Sip Repeat grind-size guide goes deeper on how to adjust grind for extraction.

Zone 3: water

Coffee is mostly water, so the water workflow should not be an afterthought.

If your method uses a kettle, keep the kettle and brewer close enough that you are not carrying very hot water across the kitchen. If your automatic brewer has a removable reservoir, make sure you can lift it out without hitting a shelf.

Specialty Coffee Association home-brewer standards focus heavily on repeatable water temperature, contact time, and brewing performance. You do not need laboratory equipment at home, but the principle is useful: consistent inputs make coffee easier to repeat.

If your tap water tastes strongly of chlorine or has another obvious flavor problem, address the water before buying more coffee accessories.

Zone 4: brewing

Give the actual brewer the best working space.

For pour-over, that means room for the brewer, server or mug, scale, and kettle movement.

For a drip machine, leave enough space to fill the reservoir, open the filter basket, and remove the carafe.

For espresso, you need more operating room than the footprint printed on the box. Leave space to lock in the portafilter, steam milk, knock out the puck, rinse tools, and remove the drip tray.

Zone 5: serving

Keep the cups you use most close to the station, but resist filling the counter with every mug you own.

Two to four everyday cups are usually more useful than a decorative wall of drinkware.

If multiple people use the station, place the everyday mugs where everyone can reach them without crossing the hot-water or espresso workflow.

Zone 6: cleanup

This is the part most aesthetic coffee-station photos leave out.

Plan for:

  • spent grounds
  • paper filters
  • a grinder brush
  • a clean towel
  • brewer-specific cleaning tools
  • descaling supplies where appropriate
  • a small tray or mat if your routine tends to drip

A station that is easy to clean will stay looking better than one that requires moving everything every morning.
What equipment does a home coffee station actually need?

The answer depends on how you brew.

Simple pour-over station

A practical setup can be only:

  • burr grinder
  • scale with timer
  • kettle
  • pour-over brewer
  • filters
  • server or mug
  • fresh coffee
  • small cleaning brush or towel

You do not need a separate tool for every variable.

Automatic drip station

Prioritize:

  • a reliable brewer
  • grinder if using whole beans
  • coffee storage
  • filters if the machine requires them
  • a simple way to measure coffee and water consistently

If you are shopping for a drip brewer, the Specialty Coffee Association's Certified Home Equipment program is a useful independent reference because certified models are tested for brewing quality, consistency, and performance.

Espresso station

An espresso setup usually needs:

  • espresso machine
  • espresso-capable grinder
  • scale
  • tamper if not integrated
  • milk pitcher if making milk drinks
  • knock box or another sensible grounds-disposal method
  • towel and cleaning supplies

Do not underestimate the grinder. An expensive espresso machine paired with a grinder that cannot make small, repeatable adjustments is frustrating to dial in.

French press station

Keep it simple:

  • burr grinder
  • scale
  • kettle
  • French press
  • timer
  • spoon or stir tool if your recipe uses one
  • a clear cleanup path for wet grounds

The press itself takes little room; the mess-management plan matters more than another accessory.

A home coffee station for a small kitchen

A small station often works better when you build upward instead of outward.

Try:

  • one narrow shelf for filters and spare coffee
  • a shallow drawer for scales, brushes, and small tools
  • a tray that defines the active brewing area
  • wall hooks for lightweight accessories where appropriate
  • only one daily brewer on the counter
  • less-used equipment stored elsewhere

The goal is not to fit everything you own into one square foot. It is to keep the daily routine together.

If the counter starts to feel crowded, remove the least-used item before buying an organizer for it.

How to make the station look intentional without making it less useful

Start with consistency rather than decoration.

A station looks calmer when:

  • cables are routed neatly
  • open bags and spare boxes have a home
  • tools are grouped by use
  • only the active coffee is visible
  • the work surface has breathing room
  • the mug selection is edited
  • cleaning supplies are close but not scattered

Use materials that already belong in the room. Wood, stone, metal, ceramic, and glass can all work. There is no single "coffee bar" aesthetic you need to copy.

Most importantly, do not place frequently used tools somewhere inconvenient just because the composition looks better in a photo.

What to spend money on first

If the goal is better coffee rather than more décor, upgrade in this order:

  1. Coffee you actually enjoy. Better raw material matters.
  2. A capable grinder. Grind consistency and adjustability affect extraction.
  3. A brewer that matches your routine. Convenience matters if it helps you brew consistently.
  4. A scale. Repeatable dosing makes troubleshooting much easier.
  5. Water or temperature control when it solves a specific problem.
  6. Storage and organization. Make the routine cleaner and easier.
  7. Decorative extras. Add these last.

That order will not be perfect for every household, but it prevents the common mistake of building a beautiful coffee bar around weak brewing fundamentals.

Product choices should solve a workflow problem

Choose gear because it solves a real problem in your routine, not simply because it is popular or expensive. Match each purchase to the part of the workflow where it earns its space.

Examples:

  • a capable grinder belongs in the grinding zone
  • a temperature-controlled kettle can support pour-over and tea routines
  • an all-in-one espresso platform can make sense for someone who specifically wants espresso with a smaller equipment footprint
  • durable drinkware can belong in the serving zone

None of those products is necessary for every reader.

A five-minute setup test

Before calling the station finished, make your normal coffee from start to finish and notice every unnecessary movement.

Ask:

  • Did I have to cross the kitchen carrying hot water?
  • Did I move another appliance to reach the grinder?
  • Could I find the filters immediately?
  • Did the coffee bag have a sensible place to close and store?
  • Was there somewhere obvious for wet grounds?
  • Could I wipe the area clean without dismantling it?

Fix those friction points first.

That is how a coffee station becomes useful rather than decorative.

Bottom line

The best home coffee station is built around sequence: store, measure, grind, heat, brew, serve, clean. Give the tools you use every day the easiest access, keep coffee protected from heat and moisture, and leave enough working space to brew safely.

You can build an excellent station with one brewer and a few good tools. Start with the routine, then let the furniture, storage, and styling support it.

Sources and further reading

Keep exploring

Related Brew Sip Repeat stories

← Back to the story library
↑